VMware vSphere 7 Update 2 has been available as of March 2021 so at the time of this post its nearing the end of May 2021. Now that the updates have had some time to have potential bugs addressed and commented on, I believe its time for a quick step by step guide on the upgrade process.
VMware vCenter 7.0 Update 2 Upgrade Notes
Pre Checks
- Fist as always you need to ensure that your environment is free from errors and take the sanity check based snapshot of your vCenter Server.
- Note the Host that your vCenter resides as well.
- Take note of any third party drivers and plugins that are currently deployed in your environment to ensure you don’t miss anything.
- Ensure all of your Host has access to shared storage to ensure smooth migrations of virtual machines during the upgrade to eliminate virtual machine down time.
As per VMware guidance the typical way to apply patches to ESXi 7.x hosts is by using the vSphere Lifecycle Manager, so with that we will be following the guidance in the below screenshots and explinations.
You have the option to Stage the software or stage and conduct the installation
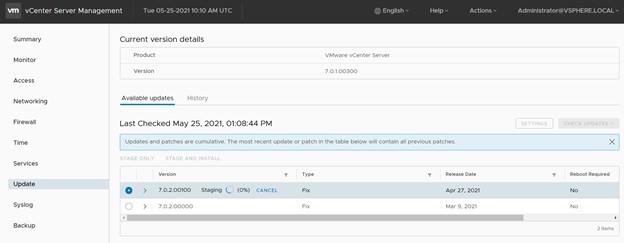
I decided the stage the software first as best practices would be to conduct the upgrade during a scheduled maintenance window following change management polices.
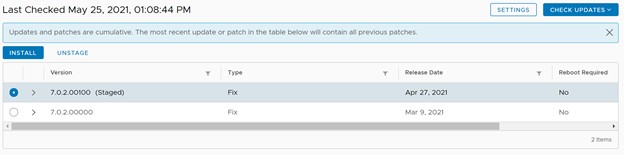
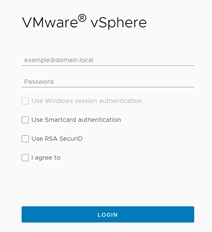
Once the software is staged, the installation process should take about 30 mins in which vCenter will not be raceable. All of your virtual machines of course will not be effected. Once complete you can browse to your vCenter instance as usual and will be presented with the following screen and new authentication options.
vSphere ESXi Host Upgrade Notes
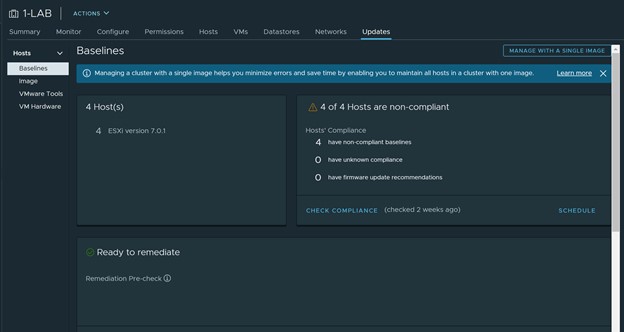
I’ve chosen to leverage the single instance baseline for this explanation of the host upgrade process to ensure uniformity in the cluster.
You will need to select your cluster and navigate to updates and select Manage with a single image.
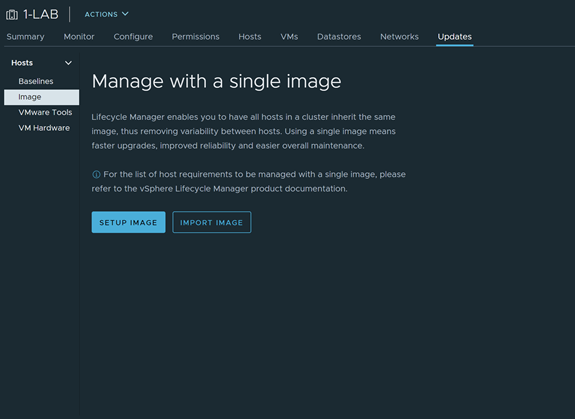
Select Setup Image
Next you will be provided image options in Step 1 of the 2-step process.

Next, I’ve selected Cisco UCS Vendor Add on as I have underline Cisco USC hardware deployed.
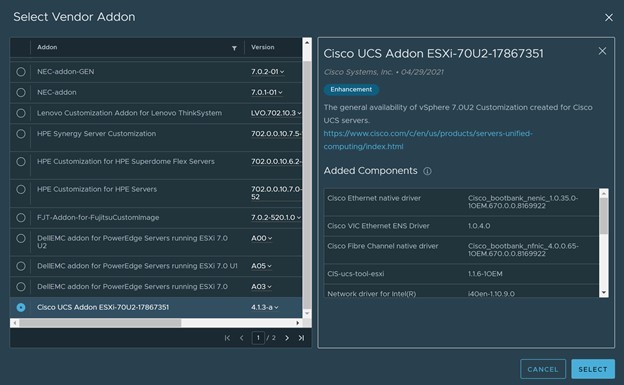
Once you have selected the appropriate System drivers chose the select to return to Step 1.
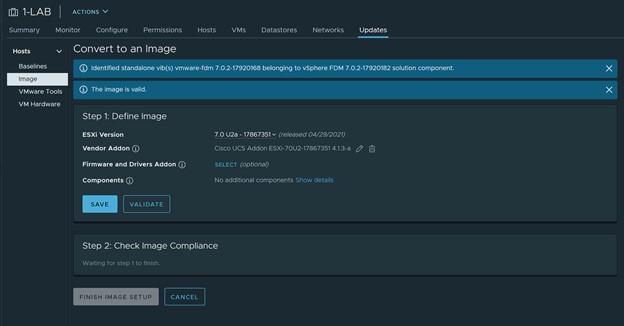
Click save to continue to Step 2 (Image Compliance)
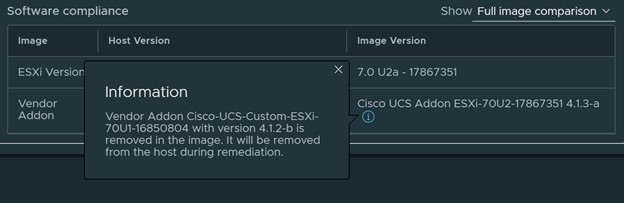
Once the compliance check is complete take note of any VIBs that will be removed from the new Image
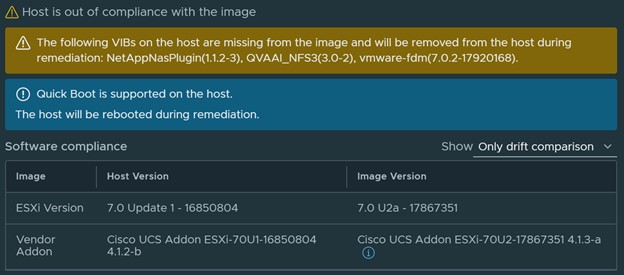
Note that the underline Cisco UCS hardware will also be upgraded per the information seen below
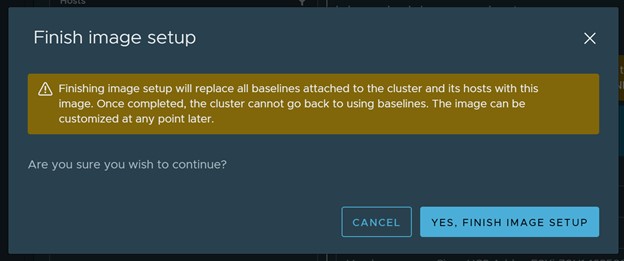
Select Finish Image setup to continue
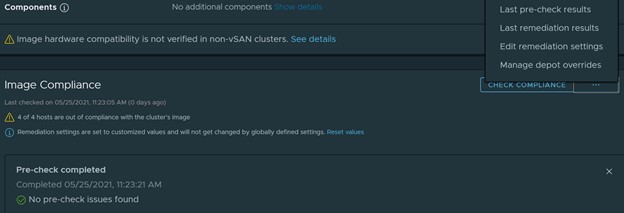
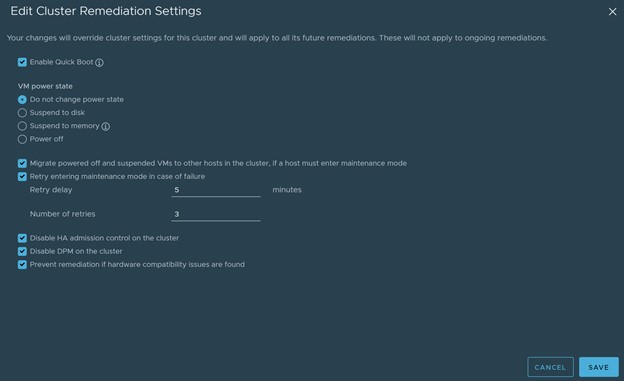
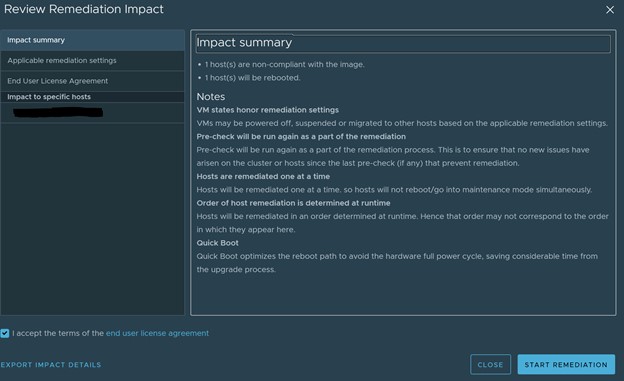
Under Compliance select the options (…) on the far right and select remediation settings and adjust settings as needs as seen below.
On the next screen is where you can begin the remediation or upgrade process. This process as usual can be conducted anytime as its non-disruptive as DRS will migrate virtual machines as one host at a time will be upgraded, granted you have DRS configured on your target cluster.
Note: I personally update one host initially, just to confirm everything is going to work out as intended. Once the sanity check is completed with the first host then I select the remediate all option to automate the process.
You can also view the progress of the upgrade as well via the status window following the start of the remediation.
Once the remediation is complete, you will now see the below compliance report.

Post Configuration Task
Virtual Machine Note: May require coordination with system owners.
- Virtual Hardware Version 19 is available for latest feature parity.
- VMware Tools Version 11.2.5 is available for latest feature parity.
Post Configuration Checks
- Ensure all prior installed plugins are functional.
- Ensure all Storage and Networking is intact.
- Ensure DRS is balanced if not configured for Automated rebalance.
- Check for any errors or warnings.
Additional Security Note:
Turn off the Service Location Protocol service in ESXi, slpd, to prevent potential security vulnerabilities.
While sfcbd and openwsmand are disabled by default in ESXi, slpd is enabled by default and you must turn it off, if not necessary, to prevent exposure to a future vulnerability after an upgrade.
Workaround: To turn off the slpd service, run the following PowerCLI commands:
$ Get-VMHost | Get-VmHostService | Where-Object {$_.key -eq “slpd”} | Set-VMHostService -policy “off”
$ Get-VMHost | Get-VmHostService | Where-Object {$_.key -eq “slpd”} | Stop-VMHostService -Confirm:$false
Disclaimer:
This Upgrade process is to be used as a reference and is not organization specific regarding pre upgrade or post upgrade checks, validations, and security configurations. Please read all compatibility and system specific literature to ensure you do not run into any Gotchas or unnecessary down time.